Tuesday, August 8, 2017

Potato and Corn Chowder with Charred Corn & Tomatoes


Periodically, I need to do a fridge cleanout and what better way to do that than to make soups and stews. I live in the Northeast. Chowders and bisques of any sort are pretty much a staple around here, but if you're making any half attempt at watching what you eat, the heavy cream involved is usually blacklisted. Potato-based chowders are a great way to eat a hearty, thick soup without adding the butter and dairy that comes along with some traditional ones. Today was a "throw everything in a pot" kind of day and see how we can add a twist on a chowder that already has a huge fan base. 

I started last night by frying a pound of bacon (I know, I know) in order to have some bacon bits as a garnish. My theory is, despite my weight fluctuations, I always lost the most when I compromised with my food selections. I can't eat a pound of bacon, but, I can have a pinch of crumbles on top. I roughly chopped it all up and threw it in my pan, turning and covering periodically until almost all the fat was crispy. This took about an hour. I removed it from the pan with a slotted spoon and laid it on paper towels. They were crispy and well done and easily crumbled further with minimal effort. I used Better Than Bouillion Organic Chicken Base (I find Costco to have the best price on this - roughly $6.89 for a 16 oz jar), but you could also use any combination of chicken or vegetable stock and broth to custom fit your dietary needs or preferences. 

The next morning, I made the chowder. 

In no particular order I used:
8C liquid (water or chicken/vegetable broth if omitting chicken/vegetable base)
8 medium potatoes, peeled and medium diced (I used Yukon Gold in this case)
2 medium celery stalks
1 small onion
1/4 red bell pepper, diced small
salt & pepper to taste
1 Tbsp minced garlic
1 pint cherry tomatoes
2-3 cups frozen corn (you could also use 2-3 ears of fresh, kernels removed)
2 scallions
2 Tbsp butter or 4 Tbsp olive oil, divided (or any combination of these)
1-2 Tbsp Better Than Bouillion Organic Chicken Base (you can also substitute Vegetable Base for a vegetarian option)
pinch of bacon to garnish

Thinly slice scallions, reserving the green tops to garnish chowder later. In a pan on medium heat, melt butter OR olive oil and sautee celery, onion, scallion whites and pepper. Add chicken base (or substitute chicken broth for liquid), continuing to simmer vegetables. Peel and medium dice potatoes and add to the pan of vegetables along with 8C water (or whatever combination of liquid you choose) and minced garlic. Bring to a low boil, cover pot and continue to simmer for about 25 minutes or until potatoes are softened. 

While potatoes are cooking, grab another pan. In this pan, heat 2 Tbsp olive oil and throw in frozen corn. BE VERY CAREFUL as it may splatter! I took mine off the heat before adding the corn, then once it was added, I put it back on the stove with heat on medium-high. Quarter cherry tomatoes and once corn is browned, add them to the pan. Salt and pepper to taste. 

Better Than Bouillion VariationsBy this time, the potatoes should be almost done. With an immersion blender, blend potatoes and vegetables until they have a creamy consistency. If you do not have an immersion blender, a regular blender would work just as well, or even a food processor. Alternatively, you can also mash everything with a hand masher if you prefer a chunkier texture. Hand stir in the pan of tomatoes and corn. Simmer 15 minutes on low to let flavors merge. Spoon into bowls and garnish with a pinch of bacon and reserved scallion greens. You could also garnish with a dollop of sour cream. More variations include substituting shrimp, crab or lobster instead of bacon or adding a small drizzle of sriracha sauce for a little heat. Costco is your best bet for the Better Than Bouillion base that I mentioned in this post. I have been using it for years and love it in my sauces, soups and stews for added depth of flavor. Costco carries beef, chicken and vegetable flavors. I also add it to the water when I cook rice.

Monday, August 7, 2017

Meal Delivery Services - Are They Budget-Friendly?

Recently, I read a blog from a woman in one of the travel groups I am in on Facebook titled "How to Save A Ton of Money Using Meal Subscription Service Promotions". It quickly piqued my interest and so I decided to do a little test run of these services.

If you're anything like many people, life can get super busy. The hours roll by so fast that it seems as though out of nowhere, 4 p.m. rolls up on a weekday rather quickly and now you have to figure out what to make for dinner. Yes, meal planning can be so helpful with this, but some days I just simply forget. Maybe I planned on having leftovers, but, either my husband or one of my kids took them to work for lunch and now there's not enough left for everyone for dinner. Some days I will forget to take something out of the freezer, which, by the way is a deep freezer and meats or pre-made meals just don't defrost as quickly as in a traditional freezer.

Cooking dinner for a family can get really redundant. Boredom can easily set in when you're  making the same 15 meals or maybe it just seems like you're making the same 15 meals. Whatever it is, after 18 years of marriage I was in some serious need for some serious foodspiration.

I saw some ads on tv for the various meal delivery subscription services available (Hello Fresh, Blue Apron, Plated, etc) and I happened to stumble across Rachel's blog the same day. I got the basic gist of applying the various promotions across the many services available and decided to give it a whirl. It worked out surprisingly well.

I knew I definitely needed to tweak this, however, to fit our family's needs. My kids - we have 4 - aren't super picky eaters, but they're not gourmet either. So, I decided that I would cook big 4 nights per week and order 3 meals weekly for 2 people. The 3 nights that we were cooking our boxes, the kids could eat leftovers. We called it our "date-less date night". For less than the cost of a dinner for 2 at our favorite restaurant, we could have three restaurant-quality meals. I was sold. I used the links from the blog post and began this exciting, quickie, culinary journey. Bonus points that most meals are 30 minutes or less!

Our first week was Blue Apron. I had someone e-mail me a free box the same day that I signed up using the link. I ended up gifting that one to my parents and using the 2nd box for myself. Blue Apron looked something like this:
1 week - 3 meals, 2 servings
Total: 6 meals
Retail Price: $59.94
Promo Code: $30 off
Bonus Promo Code: $7.50 off stacking with Rakuten
Price with Promo Code(s): $22.44
Price Per Meal: $3.74
Want a Free Box? E-mail Me!

The following week we tried Hello Fresh. I must say, this probably has the best packaging of all services we had tried because the entire meal comes in small, thin cardboard boxes that not only take up minimal fridge space if you stack them, but it's just as easy to recycle as well.
1 week - 3 meals, 2 servings
Total: 6 meals
Retail Price: $59.94
Promo Code: $40 Off
Price with Promo Code(s): $19.94
Price Per Meal: $3.32
Click here for $40 off your first delivery!

Week 3 and now it was time to try Plated. Now, this one was a little different in that I ordered a family box. This consisted of 2 meals with 4 servings each. I believe at the time, the promo was 3 free meals or so as the promo price doesn't reflect a whole dollar amount off. The kids actually loved the pork tonkatsu and the chicken bruschetta.
1 week - 2 meals, 4 servings
Total: 8 meals
Retail Price: $79.60
Promo Code: 3 free meals
Price with Promo Code(s): $55.70
Price Per Meal: $6.96
Click here for 50% off your first delivery (exp 9/27/17)

Lastly, we tried Green Chef. Eating organic is really important for myself and my family. I found this to be the one thing most of these delivery boxed lacked. Green Chef hits the nail on the head with organically sourced produce and meats. The food was absolutely delicious. It is the most expensive even with the promotional offer, however, in my opinion it was the best one. The only thing I didn't like about the service was that the menus are pre-made and there is no changing them. You pick a "diet" that you follow (vegetarian, paleo, omnivore, etc) and they will send you however many meals you choose to receive based on those selections. Thankfully, I loved all 3 of my meals. Green Chef does charge $9 for shipping.
1 week - 3 meals, 2 servings
Total: 6 meals
Retail Price: $71.94 + $9 shipping
Promo Code: 4 free meals (-$53.96)
Price with Promo Code(s): $26.98
Price Per Meal: $4.50
Want 4 free meals too? CLICK HERE

After a few weeks (about 8) I received an e-mail from Hello Fresh. If I reactivated my account, I would get 50% off my next box. Once again, I happily obliged. This time, I picked the family box. I skipped all the weeks up until September 1st because I already have other boxes coming. This will work out great for those first few days of the back to school craziness.
1 week - 2 meals, 4 servings
Total: 8 meals
Retail Price: $69.92 (NEW LOWER PRICE!!)
Promo Code: 50% off
Price with Promo Code(s): $34.96
Price Per Meal: $4.37
Want to try Hello Fresh? Click here for $40 off!

Another great service (and is probably my favorite at the moment) is Home Chef. Holy smokes these meals are easy and delicious! The packaging is great and easy to just toss right into the fridge. This service looked something like this:
2 weeks - 3 meals, 2 servings
Total: 12 meals
Retail Price: $119.40
Promo Code: $50 off given as $35 off 1st box/$15 off 2nd
Price with Promo Code(s): $69.40
Price Per Meal: $5.78
Want to try Home Chef? Click here for $30 off your first box!


Overall opinion on each service? Well for starters, if you're trying to save the environment and would like to avoid extra packaging, meal boxes may not be for you. They come with an excessive amount of packaging. The silver lining is that most of which can be recycled or reused.

Green Chef's Corn Pesto Flatbread
Green Chef has a bunch of little containers that has all of the additives pre-chopped. Each container or plastic bag has a color-coded label on it that coincides with the recipes. It's easy to get the kids involved in cooking when you can tell them to open the fridge and grab out everything with a blue, purple, green, etc. sticker. These containers are great to reuse for salad dressings or small snacks for lunch and kids. The fact that he bulk of the produce and herbs are pre-chopped also saves on time. The meals were packed with flavor and I really loved Green Chef. It was, however, the most expensive even with the promo, but that is to be expected when the entire box is organic. This would have been my favorite by a landslide had I had more recipes to choose from and more control over my boxes. I don't like that the meals are basically chosen for you based on the diet you select. It does, however, open your palate to try new things. When I am grocery shopping or cooking outside of the box I am MUCH more likely to buy organic produce and condiments. For boxes, I'd prefer that and plan on trying Sun Basket next.

Blue Apron's Crispy Catfish with Curry Vegetables
Blue Apron has quite likely been my favorite service so far. They have A LOT of different meals to pick from weekly and they don't seem to repeat themselves so I feel like, for me, this gives me the most choices. You can skip up to 6 weeks in advance. The recipes are slightly more involved than some of the other services but they are still between the 30 and 40 minute range to cook. I want to add as well that the recipes are absolutely beautiful! They're visually pleasing and make you feel fancy, which my husband and I love since we're using these for our "date-less date night"! Each insulated delivery box comes with all of the ingredients pre-packaged but not grouped together for each meal. I use Ziploc take and toss large containers and put the ingredients for each meal together in separate boxes. The boxes alsome come with a little brown bag of "knick-knacks" which are extra condiments. I refrigerate these as well as sometimes they come with parmesan cheese or butter.

Hello Fresh's Chicken Parmesan Salad
Hello Fresh by far has the best use of packaging and fridge real estate. It runs head to head with Home Chef. I have a small fridge. We bought it before we had 2 more kids. It worked for a family of 4 but it's challenging for 6. Hello Fresh comes in these small-ish boxes. Like think of a woman's size 5 shoe box that you can stack. I can manage to stack 3 high on the bottom shelf of my fridge. I wasn't a huge fan of the ground beef in Hello Fresh, but for the other items I did order I found them to be very tasty and very simple to make. I felt like Hello Fresh had these eye-opening recipes that had me thinking "Wow, why don't I make my own salad dressings?" or "Wow, this is a 6 ingredient meal and packs so much flavor!" Any food that can inspire you to make other sauces, meals, etc based on the ingredients given is a winner in my book. I have since started making my own varieties of viniagrettes. I LOVED the Chicken Parmesan Salad. To me, it was such a light, tasty dinner that was satisfying and yet didn't leave you feeling bloated. Hello Fresh has a variety of recipes to choose from and you can login and skip up to 4 weeks.

Plated's Pork Tonkatsu
Plated allows you to skip 4 or 5 weeks as well. I found these recipes to be varied and easy to prepare. Another feature that I really liked about Plated is that all of the meals are pretty much bagged together, with the exception of a few items, when the box is delivered. They are also labeled really well with what meal they belong to and so that makes any extra items easy to find thus cutting back time on gathering items. I have 2 older kids (1 just turned 18, 1 is 17) who really loved the pork tonkatsu. I also found that I definitely think of salads as a meal and don't utilize mixed greens nearly enough as a side. Once again, the recipes were relatively simple and tasted great. I recently was sent an e-mail offer, giving me $15 off of my next 2 deliveries if I reactivated. I reactivated, and tonight we're having peanut curry chicken over sticky rice.

In my opinion, Home Chef has the best packaging along with . There are some services that throw all the ingredients in the box which you then have to sort into meals. Home Chef does not! They all come in little baggies that zip, kind of like a bag of grapes. All the ingredients are in each bag and then there is a larger bag containing all of the proteins (meats, fish, etc), each individually vacuum packed. The meals are REALLY delicious and visually gorgeous. One of the meals I had was a seared salmon in a
Home Chef's Seared Salmon in Ginger Scallion Sauce
ginger scallion teriyaki glaze and it was not only beautiful but it tasted twice as beautiful as it looked. The chicken marsala was also incredible. Really easy overall from the time you open the box until you open your mouth and take your first bite.

Each delivery service was cancelled or "skipped" after the first week (literally the day after receiving the meals) to avoid getting any unexpected boxes or billing hassles. About 4 weeks later, I started getting e-mails featuring new promotional offers if I reactivated my account. I happily obliged. Plated offered a $30 credit, so this was applied as (2) $15 credits on my next 2 deliveries. Blue Apron offered a $15 credit for each box ordered in the month of July. This was a rolling credit, up to $60 that would be applied to my August deliveries. They also sent me a $10 coupon so between the 2 boxes and the (2) $15 credits, I now have a $40 account credit with them.

When I reactivated my accounts, I immediately went into my orders and "skipped" as many weeks as it would allow me. This not only gives me time to try the recipes but also to once again avoid billing hassles. One thing I may add is that all of these companies have made cancelling VERY easy.  For most of them, there is a button to click under the accounts section. With Blue Apron, I sent a secured message and they replied back with a cancellation link in a very timely manner.

It has been 8 weeks and the boxes are still coming and I do believe that I would likely keep 1 or 2 services in the long run, even if not using a promo. After all, some things we do pay for convenience.  Overall, I really like the service and they have made cooking exciting again. I am trying new foods and mixing flavors that maybe I wouldn't have done before. I'm amazed at the simplicity of the ingredients and how they yield interesting, complex flavors. The recipe cards are easy to follow. The meals are visually pleasing. I punch each set each week with a 3-ring hole punch and keep them in a binder. I don't order boxes every week, but I do order them quite often. So far, to date we have spent about $290 on 60 meals. It's absolutely budget-friendly if you're even just looking at it from a "date night" standpoint. 60 meals is the equivalent of 30 "date night" dinners and we would have spent way more than that had we gone out. I mean, really, where are you both going out to eat for an average of $10 a clip? We lack readily access to childcare and so when we do go out, it's few and far between. We are now enjoying our infrequent time alone taking walks along the boardwalk and not spending it in a restaurant eating. In other words, something we can do at home.

Have you tried any delivery services? If so, how have they worked out for you?


Friday, January 16, 2015

Garlic Parmesan Cauliflower and Leek Casserole

This was heavenly! I love side dish casseroles because once you get it all together you don't have to babysit anything and yet it feeds a few people. I love cooking dishes that can be ready at the same time as everything else so everyone can sit down together and eat food - when it's still hot!

You will need:
1 head of cauliflower
2-3 large leeks, cleaned (there is an amazing video that Melissa Clark posted on how to properly clean them here!)
salt and pepper to taste
1 Tbsp olive oil
1 Tbsp butter
2 cloves garlic, minced or pressed
1/4C shredded parmesan

Heat oven to 400 degrees.

Spray a medium/large casserole dish (Corningware, I love you!) with non-stick spray and place 1 Tbsp butter and place in preheated oven for 5 minutes or until melted. Remove dish from oven.  Press or mince garlic, however which you prefer, and place in the casserole dish along with 1 Tbsp olive oil. Clean and rinse cauliflower and add florets to the olive oil and butter mixture. Toss to coat and place in the oven. Bake at 400 for 15 minutes.

Clean leeks and chop the whites and light green parts into 3/4" diagonal sections. Chop 1 green onion. Remove the casserole dish of cauliflower from the oven and add leeks, green onion, salt and pepper. Toss to incorporate into cauliflower and add salt and pepper. Bake for another 12-15 minutes.

Remove from the oven and sprinkle 1/4C shredded parmesan on top. Bake for an additional 5 minutes. Serves 6.

Each serving contains approximately:
Calories: 108
Carbohydrates: 12g
Fat: 6g
Sugar: 5g
Fiber: 4g
Protein: 5g

Tuesday, January 13, 2015

Rainbow Farfalline with Pulled Chicken and Broccoli

Smaller box of pasta + shredded chicken + LOTS of broccoli =
FULL plate + FULL belly + FULL wallet!
Oh cream sauce, how I love thee! I adore alfredo sauce but it is so buttery and cheesy and nobody ever lost weight on a butter and cheese diet. This was amazing and so easy to make. I made the bulk of it on hold with a company for the bazillionth time.

There's an Italian specialty store near me who sells this rainbow bowtie pasta and I think it's just the cutest thing (I love everything rainbow). However, at $11.99/bag it's just not in my budget and therefore, it's not in my belly! Enter Costco. Costco with all of it's increasing organic selection has started carrying a 2 pack of Torino organic bowtie pasta for $4.99. The 2 pack consists of 8.8 oz boxes, one of which is rainbow striped and the other is solid colored. I had a giant head of broccoli from my D2DO order this week and couldn't wait to use it! Trick your mind into eating a stuffed plate by adding lots of broccoli and shredding the chicken. Plus, the box of pasta is only 8.8oz as opposed to the traditional 16 oz in a standard box.

For this recipe you will need:
2 large split chicken breasts (or about 1 lb chicken)
8 oz pasta (I used Torino organic rainbow farfalline)
4C lowfat milk (I used 1%)
4 Tbsp butter
1/4C grated parmesan
1 large broccoli head (or about 3C florets)
3 cloves garlic

In a large pot, bring 2 garlic cloves and water to a boil. Add chicken breast and boil for approximately 1 hour. Remove from water and set on a plate to cool enough to pull. Set aside.

In another large pot (unless you wash out the first, which I did) bring salted water to a boil for the pasta. Make sure there is enough water as we will be adding the broccoli to the water eventually as well. Bring remaining clove of garlic and water to a boil. Add pasta. Pasta will need to cook for 10-12 minutes, so while there is roughly 5-7 minutes left, add the broccoli (depending if you used florets or if you used stalks as well. less time for florets).

In a smaller pot, melt butter and whisk in 2 Tbsp flour (I used King Arthur Organic). Once it is whisked to a pasty consistency, SLOWLY whisk in milk and simmer on a medium/low heat, stirring frequently. Mixture will thicken as it increases in temperature. Add 1/4C parmesan and whisk to melt and incorporate. I love giving it a final combover with my immersion blender. It makes everything super smooth and consistent.

This makes roughly 6 servings.

Each serving contains approximately:
Calories: 409
Fat: 15
Carbs: 41
Dietary Fiber: 1
Sugar: 2
Protein: 27

Saturday, January 10, 2015

Adapted Berry Pudding Cake

My mother has been a diabetic since she was about 45 years old. Recently, she subscribed to "Diabetic Living" magazine. I really like the recipes that they have because they seem to use real, whole ingredients. I think in reality, we can eat anything that we want, in moderation. I also think eating foods that our bodies were made to process as opposed to synthetic dyes, flavors and ingredients is a much better choice when faced with a plethora of cooking options. The original recipe can be found here. I love this because the end result is less than an inch of cake amidst a bunch of colorful berries. It's just sweet enough and doesn't leave you feeling like you missed out on dessert.
My version is as follows (which isn't that much different, but a few tweaks were done):

1/4C sugar
1/2C coconut flour
2 large eggs
1C almond milk
dash salt
1 Tbsp vanilla
1/2 tsp baking powder
Mixed berries - I only used about 2C as opposed to the 3C in the original
-4 large strawberries, sliced
-1/2 pt blueberries
-about 15 raspberries

Preheat oven to 400 degrees.

Beat  sugar, salt, eggs, milk, flour, baking powder and vanilla in a medium bowl. Set aside. Grease (non-stick spray, coconut oil, etc) a baking dish (I used my 8 inch round corning ware dish), and sprinkle a pinch of brown sugar on the bottom. Layer raspberries and blueberries on the bottom of the dish. Pour 1/2 mixture on top and spread evenly. Layer sliced strawberries on top of batter. Pour and spread remaining batter on top of the strawberries and bake for 25 minutes or until golden brown.

Makes 6 servings.

Each serving contains approximately:
Calories: 120
Fat: 3g
Carbs: 17g
Protein: 4g
Sugar: 12g
Fiber: 4g

Wednesday, January 7, 2015

Naan Veggie Boards with Avocado Sauce

You can add some shredded
mozzarella, too!
Happy New Year! I took a break from blogging, because frankly, with the holidays, I took a break from cooking *hangs head in shame*. So now it's all about "new year, new me" blah blah and I've resumed my place in the kitchen. I had a leftover avocado and for some reason everytime I eat them outright, it makes me violently ill. I'm not sure if my lack of gallbladder can't handle the fat, but I hate to waste them and the nutritional benefits are stellar. I decided to make a sauce out of the one I had. You can top this with whatever veggies you want. For this one I used red pepper, green, pepper, onion and broccoli. Honestly, the hardest part of this is making the sauce, which takes all of 5 minutes. This makes 3 veggies boards.

You will need:
1 medium avocado
1 Tbsp tomato paste
Juice from 1/2 lime (about 1 Tbsp)
1 clove garlic
2 Tbsp olive oil
salt & pepper to taste
3 Naan flatbreads
Assorted Vegetables for the topping
1 Tbsp grated parmesan

Preheat oven to 350 and "bake" flatbread for about 8 minutes or until slightly firm.

In a skillet, sauté veggies until they are about 1/3 to 1/2 cooked. Then remove from heat. I prefer them a little on the crispy side.

In a food processor, blend avocado, tomato paste, lime juice, and garlic. Mixture will be the consistency of mayonnaise. Sprinkle with salt and pepper and stir. Spread over the flatbread and top with veggies. For 3 flatbreads, I thinly sliced 1/2 each red pepper, green pepper and yellow onion. I also used 1 medium head of organic broccoli I had in my Door to Door Organics* order. Sprinkle with 1/2 - 3/4 Tbsp grated parmesan. Bake at 350 for 8-10 minutes.

Each flatbread contains approximately:
Calories: 643
Fat: 28g
Carbs: 83g
Protein: 19g
Fiber: 12g
Sugar: 10g

*I am able to send out about 5 coupons per month to try them out (I think they are for $15 off a box). I've been ordering from them for about a year now and really have loved everything I have gotten. I cannot wait until peach season! If you want one, just send me your e-mail and I can send one  to you.

Sunday, November 16, 2014

Easy-Peasy Pickles!

6 ingredient pickles! So easy!
I really haven't blogged in forever and for that I apologize. Summer came and went and we are amidst the ever-decreasing temperatures of fall in NJ. I bought a few organic cucumbers the other day and after visiting my parent's house yesterday found myself with a bunch of dill. Of course I could always dry it out and add it to salmon dishes or make some dill butter, but instead, I'd rather take a stab at some fresh pickles. I've also been pinning myself to death on Pinterest, and looking at all of the cute holiday DIY projects out there has me a bit inspired. So many are fat and sugar laden and while these contain both sugar and salt, they're not as horrible for you as the 500 cookies and gallon of eggnogg (cocktails?) that will be staring you in the face this holiday season. You could very easily dress these up with some raffia or ribbon with a tag that says "Happy Holi-dills".

With that being said, I present you with my pickles. I won't be able to eat these for a few days because they need to "marinate" but this is how I made them. I will update this post in a few days and let you know how they came out!

You will need:
1 qt mason jar
1/3 C white vinegar
2 C total of water - 6 oz of which came from the Keurig
a handful of fresh dill
1 garlic clove, quartered
1/3 tsp salt
1/3 C sugar

In a bowl, combine sugar, salt and garlic.Slice a large cucumber into 1/2" slices. I use organic cucumbers, so I don't peel them, however, if they were not, I would peel the outer skin off. Add 6 oz of hot water (small Keurig setting) and stir to melt the sugar and salt. Add vinegar. After it is mixed well (about a minute in) add 10 oz COLD water. You want the sugar/salt water to be cool enough as to not "cook" the pickles.

In a 1 quart mason jar, place fresh dill at the bottom and then placed the sliced cucumbers on top. Pour liquid mixture over the cucumbers, seal the lid tightly and shake a bit to incorporate the cucumbers, dill and liquid. Let sit, refrigerated for a few days (I would say 3 minimum) to absorb the flavors. Each day, turn the jar upside down and right side back up again to mix up the flavors.

Have you ever made your own pickles? Do you add different flavors such as lemon or Old Bay seasoning? Post in the comments below!


Thursday, August 7, 2014

Panko-Crusted, Seasoned Chicken Balls with Sweet Thai Chili Sauce

Just the right amount of sweet + heat!
A few weeks ago, I was in the grocery store when I came across Blue Dragon's sweet chili dipping sauce. The color reminded me of the mango dipping sauce that accompanies our West-Indian conch fritters that we love so much when we're on the "rock". Then I remembered, that there is a restaurant where I had a similar sweet chili sauce that calamari was tossed in and I loved it. This particular sauce has just the right balance of sweet and heat; it's just enough to give it a little tang but not so hot that you need to frantically drink your entire glass of water without coming up for air.

I love meatballs but since they're usually so high in fat, I decided to make a new version of chicken meatballs. I still wanted them to have that island flare, so instead of using the traditional "meatball spices" of oregano, basil, etc., I decided to make it very, very simple. The meat itself only had about 1 Tbsp of Cruz Bay grill rub from St. John Spice that we purchased on our most recent trip to STJ. If you have never been there or are planning on visiting St. Thomas, I'd highly recommend hopping on a 15 minute ferry ride and paying that store a visit. I have no words for the coffee and teas. They're just household staples.

This "recipe" was very simple. It makes roughly 30 meatballs. I sauteed some fresh yellow squash from the garden to accompany the meatballs and my toddler loved them.

1 package of Perdue ground chicken (1lb)
1 package of Perdue ground chicken breast (1lb)
1 XL egg
1 Tbsp Cruz Bay Grill Rub
1/4 tsp garlic powder
1/4 tsp lemon zest OR McCormick Lemon Pepper Grinder (to taste)
1C Panko crumbs, for rolling

Mix everything EXCEPT the panko crumbs together in a bowl. Since I didn't use breadcrumbs to dry out the chicken and make it more manageable to form into balls, the mixture is pretty soft.  I spooned by tablespoonful into my thumbs and formed as best of a ball as I could. I then rolled them into the panko crumbs and shaped as needed, forming a ball that's about 1.5" in diameter. Bake at 375 for about 30 minutes for until no longer pink in center.

For the sauce:
1/3 C Sweet Thai Chili dipping Sauce (I used Blue Dragon brand)
2 Tbsp water
Whisk together water and sauce and heat in a saucepan until bubbly. Toss cooked chicken meatballs in a large bowl with sauce.

Each 1.5" meatball yields approxmimately:
Calories: 55
Fat: 1.69g
Carbs: 3.2g
Protein: 7.1g

*Note*
Spices were not added to nutritional information.


Monday, August 4, 2014

Zucchini Potato Pancakes

Make the most of summer vegetables
with this easy side dish!
I love summer and all of the vegetables that the garden brings. Here is an easy appetizer or side dish that you can prepare ahead of time and pop back in the oven to reheat or you can freeze between layers of wax, parchment or freezer paper to use during the off season.

Zucchini Potato Pancakes

1 large zucchini (about 3C shredded)
2 medium potatoes (about 1.5C shredded)
2 eggs
1 tsp salt (more or less to taste)
1 tsp ground black pepper (again, more or less to taste)
1/2 small onion, grated or finely chopped
1 Tbsp oil
1/2 C seasoned bread crumbs

With a grater, shred potatoes and zucchini into a bowl. Dump out the bowl over a cheesecloth (this is the easiest way) and squeeze out to drain excess water, then place back into the bowl. I have done this with the cloth and drained nearly 1C of excess liquid from the vegetables. In a separate bowl, whisk eggs, salt, pepper and onion. Add to shredded zucchini and potatoes. Add breadcrumbs and mix thoroughly. In a skillet, heat 1 Tbsp oil and drop by spoonfuls. Flatten out to form pancake shape. this recipe yields approximately 12 2-3" "pancakes".

In each "pancake":
Total Calories: 69
Fat: 2.2g
Carbs: 10.3g
Dietary Fiber: 1.4g
Sugar: 1.4g
Protein: 2.6g

Tuesday, May 6, 2014

Goat Cheese & Sun-Dried Tomato Ravioli with Mushrooms & Tomato

I'm a huge fan of a meal I can whip up in 10 minutes or less that packs a flavorful punch but doesn't destroy my "belly budget" for the day. Sunday was the first time I had ever stepped into a Trader Joe's and I'm sorry I haven't been to one sooner. One of the products I had picked up (and loved!) was the goat cheese and sun-dried tomato ravioli. They were about $3.49 and in the refrigerated section. There are 3 servings (or roughly 21 pieces)  per package. Fresh ravioli takes so little time to cook, so I like to use it whenever possible.


You will need:

1 8 oz package mushrooms
2 medium sized tomatoes
2 Tbsp whipped cream cheese
1 Tbsp olive oil
1 tsp garlic powder
sprinkle of sugar
dusting of salt
lemon-pepper seasoning
1 package Trader Joe's goat cheese & sun-dried tomato ravioli.

Bring water to a boil in saucepan and cook ravioli according to package directions. While they are cooking, chop tomatoes & mushrooms and sautee in olive oil. Add whipped cream cheese and stir with a spatula to melt and incorporate. Season to taste, using lemon-pepper, salt and a pinch of sugar. The sugar will remove some of the acidity in the the tomatoes. Sprinkle with garlic powder. Each serving contains about 1 C of sauce, tomato and mushroom mixture and 7 ravioli (there are roughly 21 in the package). Makes 3 servings.

Each serving contains approximately:
Calories: 374
Fat: 21.75g
Carbs: 34.03g
Protein: 12.39g

Friday, April 25, 2014

Cranberry Chicken Salad Stuffed Cabbage

super crunchy!
I am always looking for ways to eliminate the bread in my lunch, frankly because I love pasta. I'd rather take the "budget" for my lunch and "spend" it on dinner. I also love using cabbage for a leafy crunch whether it be in tacos, cold wraps or hot dishes because it's a hardy green that doesn't seem to wilt easily when exposed to other foods or sauces.

I made a simple chicken salad and dressed it up a bit.

The key to this dish is blanching the cabbage leaves before you try to construct them. I fill a large skillet with lightly salted water, bring to a boil and have a large bowl of ice water nearby. Dip the cabbage leaves into the boiling water for about 20-30 seconds, just enough to make pliable. Immediately place them in the ice water bowl. This will stop the cooking process almost instantaneously. It will also enable you to wrap the leaves without breaking them. They hold up extremely well, even after biting into them. I had enough "salad" in this to stuff about 4 large cabbage leaves.

You will need:

4 cabbage leaves
1 - 4 oz piece of chicken breast
1 Tbsp reduced fat mayonnaise
1/8 C dried craisins
1 tsp lemon rind
1 Tbsp chia seeds
1 medium celery stalk
1 scallion
pepper, to taste
paprika, to taste

Boil the chicken and either shred or chop finely, whichever you prefer and set aside. Finely chop celery and scallion. Stir in mayo, lemon rind, craisins, chia,  pepper & paprika, to taste. Gradually add in chicken. Spoon into center of cabbage leaves and roll the back end first, then starting at one side, fold over. Lay seam-side down.

Each recipe above yields approxmiately:
Calories: 300
Fat: 9g
Carbs: 28g
Protein: 26g

Deconstructed Stuffed Peppers


Reinventing the leftover!
At some point, many of us end up with leftovers in the fridge. I hate to see any food go to waste and like to incorporate leftovers as much as possible, reinventing them into new dishes or spins into old classics. I had made a batch of brown rice and had some leftover. Usually, when I make my italian farro & turkey stuffed peppers, I mix farro into the stuffing, substituting the rice. However, the last time I made them I used all of my stuffing. Honestly, I managed to take the ground turkey out and then 4:00 p.m came and my first thought was "What am I going to do with this? I really don't feel like cooking." Of course take out is easier, some may assume, but is it really? Think about it, it costs more and you have way less control about what goes into it. Typically you're not getting your food in 20 minutes anyway and within 20-30 minutes you can whip up something that is not only better for your belly, but also is better for your budget!

It's no secret how much I love Aldi, so when I was in there last, I picked up a box of Fit & Active quick cooking brown rice. I threw it in the rice cooker according to the directions on the back and it was done in about 10 minutes. I love my rice cooker because it frees up a burner. After I hit the lottery, I'll get one of those fancy 6 burner stoves. In the meantime, I'm in a 7 square foot house with 4 burners on a range that doesn't even have a clock, but it works, so who cares?!

For this dish, throwing the chopped peppers in for the last 8 minutes or so of cooking helps to keep them crunchy. You can add more or less water to change the amount of moisture. I ate this with a side of sauteed zucchini and mushrooms and BAM! (nearly) instant dinner.

You will need:

1lb ground chicken or turkey (I used turkey)
1 large green pepper or 2 medium (I like it colorful, so I used a mix & finished up all of the chunks in the fridge)
1 1/3 C cooked brown rice (use leftovers or make separately - about 3/4C uncooked)
1 small onion
3 Tbsp ketchup
1 Tbsp worcestershire sauce
1 tsp garlic powder OR 1 garlic clove
black pepper, to taste
1 tsp fennel seeds (optional)
1/2 C water

In a large skillet, brown turkey and onion. While that's cooking, coarsely chop pepper and set aside. Gradually add in about 1/4 C of the water and simmer. Add ketchup, worcestershire sauce, garlic (or powder, if using), and black pepper. Gradually stir in brown rice, adding remaining water if necessary to keep moist. Stir in fennel and chopped pepper, stirring to heat through.

Each serving yields approximately:
Calories: 340
Fat: 9g
Carbs: 39g
Protein: 27g

Thursday, April 24, 2014

Italian Farro & Turkey Stuffed Peppers

Italian farro gives this a protein punch!
Ohhh farro, how I love thee! One of the greatest supermarket finds for me, was farro. It has a firm texture and I have found it to be the best replacements for rice or pasta to date. If you haven't heard of it, it's an ancient grain that packs in 7g protein, 5g dietary fiber & 170 calories per serving. One serving is 1/4C.  I decided to use it as a stuffing previously in large mushrooms and when my husband mentioned that we hadn't had stuffed peppers in a while, I thought this would make the perfect substitution for rice. My beef (or lack thereof) with peppers is that I'm not a huge fan of them cooked. I don't like them soggy. I always say, I love my vegetables hot but raw. Preparing the stuffing and having it fully cooked enables me to bake the peppers just long enough to make them warm, but still crunchy.

You will need:

4 large peppers
1/2 C cooked farro
1 lb ground turkey
3 Tbsp ketchup
1/2 C water
1 Tbsp worcestershire sauce
1/2 small onion, chopped
1 Tbso minced garlic (or 2 cloves)
1 C part-skim shredded mozzarella

Preheat oven to 400.

Prepare farro according to package directions and set aside. In a large skillet sautee ground turkey with onion. When fully cooked, add ketchup, worcestershire sauce, garlic, salt & pepper (to taste). Add 1/2 C water and slowly stir in cooked farro. Continue to sautee until the water has been fully incorporated.

Cut tops off of peppers and clean out the seeds. Stuff with farro & turkey mixture 7 top with part-skim mozzarella. Bake at 400 for 15 minutes.

Each stuffed pepper yields approximately:
Calories: 428
Fat: 18g
Carbs: 27g
Protein: 48g


Lemon Coconut Crusted Chicken

These were delicious! Very simple and only took about 20 minutes to cook. I had these with mashed potatoes and steamed broccoli. Anytime dinner is on the table within 30 minutes, it's a win (assuming I actually took the meat out of the freezer before noon!). They were super juicy and packed such a nice flavor. I used 4 chicken breasts that were about 4-6 ounces each.

You will need:
4 boneless, skinless chicken breasts
1/2 C crispy rice cereal
2 Tbsp unsweetened coconut flakes
1 Tbsp grated parmesan cheese
2 tsp lemon rind
2 tsp lemon juice
1 Tbsp reduced fat mayonnaise
1/4 tsp paprika
garlic powder & black pepper, to taste

In a small bowl, combine reduced fat mayonnaise, 1/2 of the lemon rind, lemon juice, pepper, paprika, & garlic powder. Rinse chicken and pat dry with a paper towel. Place on parchment paper lined cookie sheet. With a small spreader, spread mayonnaise mixture over the top of the chicken.

To make the breading, crush crispy rice cereal, unsweetened coconut flakes, grated parmesan and remaining lemon rind. I used a food processor and it comes out like very fine sawdust. Sprinkle it with a spoon and pat down with the back side of the spoon. Bake at 400 for 25 minutes or until top is slightly browned and chicken is done.

In each serving yields approximately:
Calories: 148
Fat: 4g
Carbs: 4g
Protein: 23g


Thursday, April 17, 2014

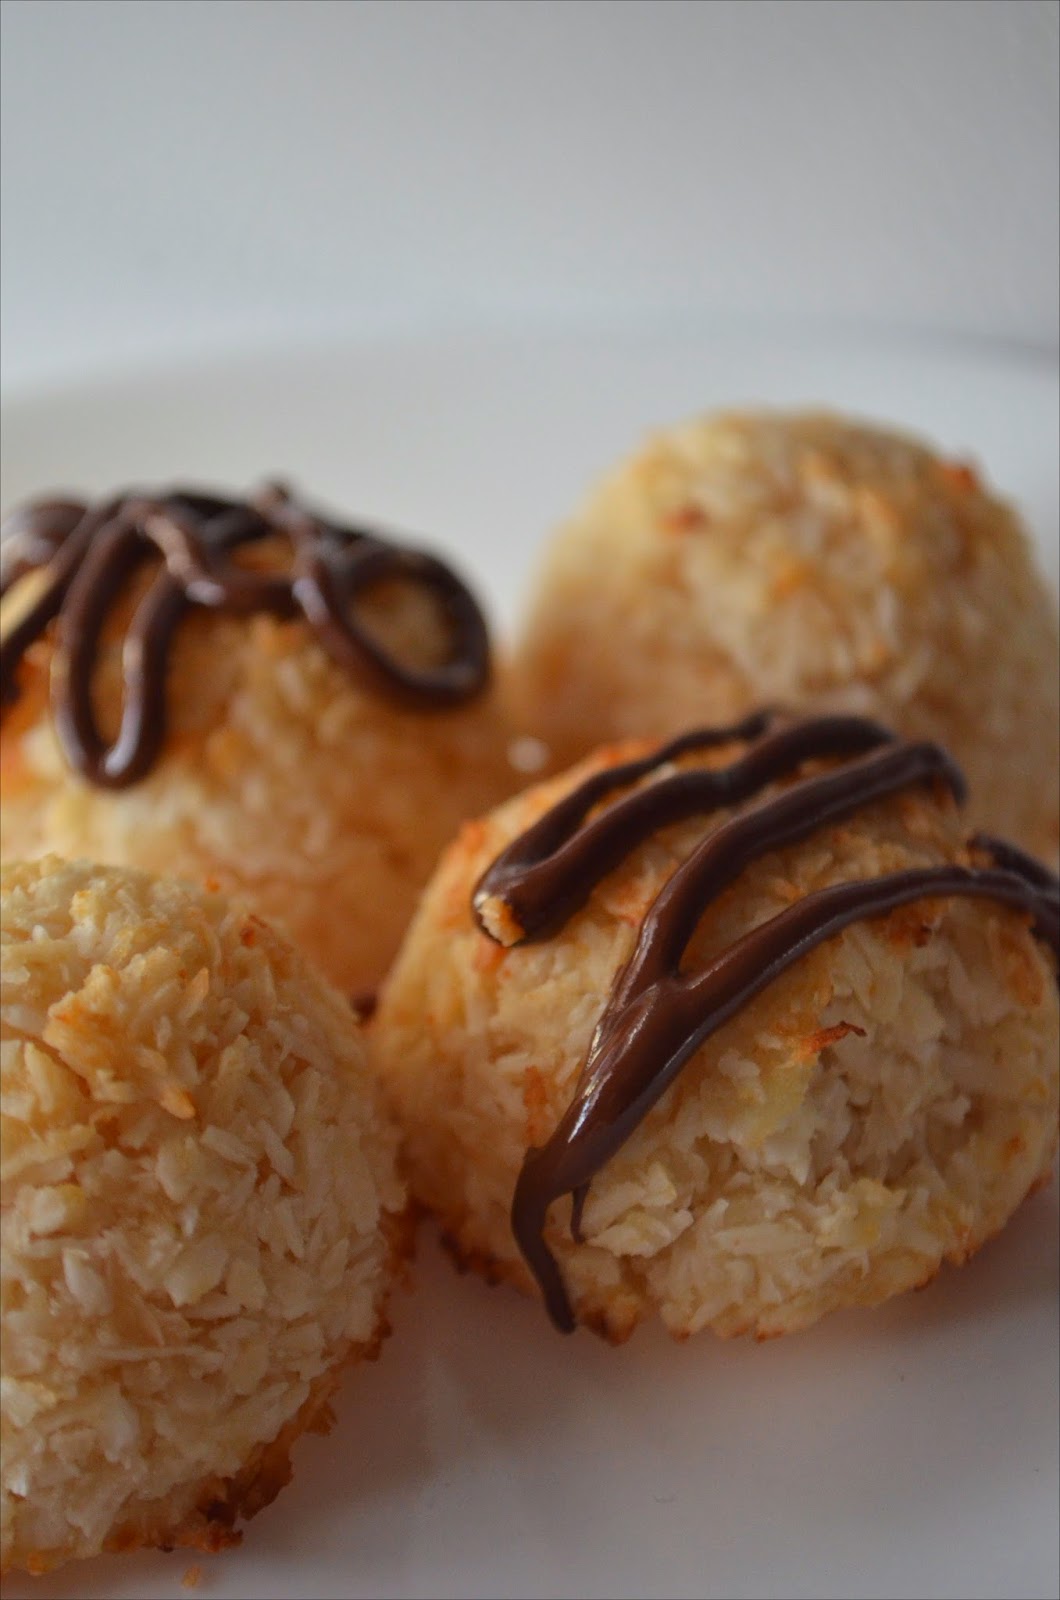
Skinny Coconut Macaroons

The other day, a friend of mine had posted a recipe for
coconut macaroons from SkinnyTaste.Com. I love all of her recipes that I have tried, especially the butternut squash and spinach lasagne rolls. I was inspired by her recipe so with a few changes, I came up with my own.

You will need:
2 C unsweetened shredded coconut
1/4 C sugar
1 Tbsp honey
3/4 C egg whites (about 5 large eggs)
1 Tbsp vanilla extract (I love vanilla)
1/2 tsp almond extract

*Optional: dark chocolate chips for melting & drizzling over the top.

In a saucepan, whisk egg whites & sugar until thoroughly incorporated on low heat for 10-15 minutes. You want the mixture to be moist and sticky with a nice shine to it. Empty into a large glass bowl and incorporate coconut. After the coconut is mixed thoroughly, add honey, vanilla and almond. Mixture shouldn't be dry, but crumbly, yet packable (like brown sugar). To shape the balls, I used a 1 Tbsp coffee scoop. I scooped some of the mixture in and packed well, then tapped out the ball. The bottom is flat which makes it great for baking. bake at 400 for 10 minutes or until golden brown. You can drizzle chocolate on some of them if you wish. The numbers below are for coconut macaroons without chocolate. Makes 24.

In each macaroon:
Calories: 48
Fat: 3.35g
Protein: 1.16g
Carbs: 4.19g
Sugar: 3.15g


Sinfully Sweet Peanut Butter Coconut Cups

So tasty, minimal ingredients!
A few days ago, in my weight-loss challenge group, a member had posted this recipe for "Easy Chocolate Almond Butter Cups" from paleOMG. I love how she used minimal ingredients and they looked like they took a short amount of time to make. As a mother of 3, I'm always looking for desserts I can make my children that don't have a scary list of ingredients while not making my kitchen a disaster in the process. Let's face it, nobody feels like cleaning up after a day of baking fun. This uses about 3 bowls, a knife and a few spoons. I set out on Holy Thursday to make those almond butter cups for the upcoming Easter holiday, but ended up stumbling across a little gem in the food store. Apparently, I have been living under a rock because Earth Balance makes these all-natural nut butter spreads. This one, in particular was creamy coconut & peanut spread and is one of the most delicious concoctions I have ever tasted. Since cutting back my sugar drastically, I find sweetness in the most natural food items. Earth Balance's creamy coconut & peanut spread contains only 2g of sugar. I can't wait to discover what else I can make with it. Next up will definitely be some of my no-bake homemade energy oat bars. But for now, we're on to these little cups of heaven.

You will need:
12 Tbsp Earth Balance creamy coconut & peanut spread (about 3/4C)
1 Tbsp honey
1/2 Tbsp coconut oil, melted
6 Tbsp unsweetened coconut flakes (I use "Let's Do Organic" brand)
10 Tbsp 85% dark chocolate chips

In a bowl, combine melted coconut oil, honey and creamy coconut & peanut spread until mixed thoroughly. Gradually add in coconut flakes, reserving about 1 Tbsp to garnish cups. Spoon (and I use a baby spoon - approx 1tsp) 1 spoonful into a mini muffin pan. To make even, start in the middle and "swirl" the mixture evenly throughout the pan. If you are using a non-stick pan, greasing is unnecessary. Melt chocolate chips (I have a 600W tiny microwave and melt for about 3 minutes at 30-40%) and pour about 1/2-1 tsp over each cup. Sprinkle with reserved coconut and set in the freezer for about 20 minutes. To store, refrigerate and keep in an airtight container. Makes 24 cups, which contain good fats and minimally processed ingredients

In each "cup":
Calories: 93
Fat: 8.5g
Carbs: 4.79g
Protein: 0.29g
Sugar: 4.08g

Tuesday, April 15, 2014

Skinny Chicken Cordon Bleu "Cupcakes"

I love chicken cordon bleu, but anything revolving around French cuisine is hardly "light". I decided to change things up a bit and make a "skinny" version. I also made them into little "cupcakes" using Nasoya egg roll wrappers. This not only turns them into portion-controlled sizes, but also super portable for gatherings and parties.

For the main parts of this recipe you will need:
18 egg roll wrappers (I use Nasoya brand)
12 oz chicken (about 3 4 ounce boneless breasts)
4 ounces boiled or baked ham, cubed (I get a thick slice from the deli - Healthy Ones, 1/4 lb)
1/2 C panko crumbs (optional) to top over "cupcakes" before cooking

For the sauce:
2 C milk of choice (I used unsweetened almond)
3 Tbsp flour
1 Tbsp butter
4 ounces swiss cheese (I use Jarlsberg)
3 Tbsp grated parmesan
1 Tbsp whipped cream cheese
1 tsp garlic powder
ground black peppercorns, to taste

In a pan, boil the chicken until done. Remove from water and slice into tiny pieces (or shred if you are able to). Put in in a large bowl and set aside. Cut the ham into 1/8" strips and cube. I end up with tiny dices of ham that are about the size of the capital "O" letter on a standard keyboard. Set ham and chicken aside, in a large glass bowl.

To make the sauce, first heat butter and gently whisk in flour. Gradually stir in milk. Continue stirring while heating and add garlic powder, optional pepper, parmesan, swiss, and whipped cream cheese. Continue stirring until fully melted and sauce has a smooth texture. Top with grated black pepper and stir to incorporate. Add mixture to ham and chicken that's in the glass bowl.

To assemble, spray a muffin pan with nonstick spray or coat with oil. Fill each muffin compartment with one large egg roll wrapper and fill with creamy chicken and ham mixture. Optional* Top each "cupcake" using the 1/2 C of panko crumbs, if desired.

Bake at 350 degrees for 15 minutes, or until egg roll wrappers are crispy. Due to varying oven times, check after 10 minutes.

Each "cupcake" contains:
Calories: 127
Fat: 3.75g
Carbs: 14.06g
Protein: 9.3g

*Nutritional information above includes panko. Picture above omits panko.

Sunday, April 13, 2014

Baked Salmon with Spaghetti Squash, Baby Spinach and Tomatoes

I love spaghetti squash partly because it's a guilt-free food and also because it's so easy to prepare and you can cook it while you're doing other things. I'm always a fan of any foods that you don't have to "babysit". The other day, I broiled a 4 oz piece of salmon with a drizzle of olive oil and a spread of 1/2 tsp whipped butter. I used a lemon-pepper grinder that's made my McCormick along with a smidge of tarragon. I baked it at 400 for 15-20 minutes. The recipe below makes 4 servings.

You will need:
4 - 4 oz salmon filets
1 small spaghetti squash
1 container of grape or cherry tomatoes
3 C baby spinach leaves
3 Tbsp grated parmesan
salt, pepper, garlic powder to taste

For the sides, I baked a small spaghetti squash in the oven at 350 for about 35-45 minutes. It's very simple in that I literally just open the oven door and place the squash in, leave it and check it later. When done, I cut it in half, scoop out the seeds and proceed to fluff it with a fork, carefully shredding all of the "strings". In a separate saucepan, cut all of the tomatoes in half and simmer with salt and about 8-10 oz water. Bring it to a low boil and stir in 2 Tbsp grated parmesan, garlic powder and pepper. Add baby spinach to simmering sauce and toss frequently for another 5 minutes. Add shredded spaghetti squash and toss to coat. Dish onto plates and garnish with remaining parmesan.

In each serving:
Total calories: 292
Carbs: 12.61g
Protein: 28.28g
Fat: 14.54g
Dietary Fiber: 3.4g
Sugar: 5.79g

Saturday, April 12, 2014

Unsure of Where To Start? How About Here!

Image courtesy of tinypic.com
Eating healthy can be anything but boring. I started my journey in March of 2013 and kicked it into high gear by September. The reason for this blog is to let others who find themselves in the position I found myself in that there is, in fact, a way out of the hole you dug yourself and that more people than you think are riding along your boat, in the same deep water. I am not a weight loss expert, nutritionist, personal trainer or dietician. What I am is a mother of 3 and the wife of a man who has loved me no matter what I looked like on the outside. This has been both a blessing and a curse. The curse being, I let myself get over the top overweight and didn't do anything about it until the hole I was in was so deep I could barely see any light. I want to stress the importance of loving yourself enough so that you really try hard to make a change. I want you to write somewhere "Because I am worth it!", somewhere, and look at it everyday. All too often, especially with mothers and caretakers, we put our own needs on the back burner. In the rush of daily life we tend to graze on unhealthy foods and not put the time into feeding or taking care of ourselves as well as we do for others. There is nothing selfish about taking time to take care of yourself, even if it means you complete a 20 minute workout or sit down once a week to plan some meals. We all deserve the time and attention we give to others. With that being said, these are some tips that worked for me and I hope they work for you as well. Like anything else in this blog, take whatever you can from it that you find may apply in your life or help your situation. After eating myself into oblivion, I realized that I clearly had a problem. Some people can live their entire lives in moderation, eat what they want and never gain a pound (or stay within 5). I was not one of those people.

When I began my journey, the FIRST thing I had to do was become food conscious. Years of haphazard eating frenzies and celebrations left me in the worst shape of my life. We have this crazy notion in this country that everything must be celebrated with food. We mourn with food. Every emotion from A-Z often times have food in the equation. I had absolutely ZERO knowledge of my daily caloric intake. I had no idea that actual AMOUNT of food I was consuming on a daily basis. I gained over 130 pounds since I began dating my husband. I'm not only embarrassed to admit that, but it leaves me absolutely sick that I put my health in jeopardy. It makes me sad that I made my heart and vascular system work as hard as it had to during the past 15 years. 130 pounds seems like an incredible amount of weight - and it is. However, when you break it down it was less than 10 pounds per year. 8.6 to be exact. Break it down further and it was a mere 3/4 of a pound per month. Again broken down, it comes out to 0.16 pounds per week. Teeny tiny weight over 15 years that I never took off. Guess what? Tiny changes gave me huge results. What goes up must come down, so to think it will come off quickly is unrealistic. However, it won't take 15 years and I still believe I can do it in less than 2. I am nearly half way there, roughly 8 months in.

For the first 2 weeks, I didn't change anything in my diet. When I say the word "diet" I am referring to it nutritionally as a whole. Everything I eat is my diet. I am not insinuating to cut yourself off, feeling deprived and hungry. On the day I decided to make a lifestyle change, I downloaded an app for my phone called "Fat Secret". Similar to "My Fitness Pal", this app would enable me to track all of my food I consumed for the day. I made a vow that I wouldn't eat anything without logging it in. Yes, my phone was with me everywhere and yes it was on the table, but I logged everything I ate day in and out and by the time a week passed I realized I consumed way too many calories in a single day. The other change I made was that I religiously drank a MINIMUM of 64 ounces of water daily. Some days if I worked out, I drink more, however, we're starting slow. Just drink your water and log your food for 2 weeks. I would also highly suggest taking your measurements. There are weeks that the scale won't budge but you will lose inches. Keeping a log of your size will help you from feeling discouraged if you come across a week where the scale just isn't going anywhere. This is a process and we are building on what we learn. All too often, people jump into this lifestyle change head first and find themselves overwhelmed and defeated (as I had so many times before). I found making tiny changes and building on those blocks would enable me to keep these changes a permanent part of my daily routine. I wanted to be one of those women on the cover of a magazine that had a headline something along the lines of "I lost 100 pounds and kept it off!".

Now that I knew what I ate, I had to make another change. The first two weeks were my "awakening period". Now I had to go through detox. "Detox" is where I started to make changes that would keep me on the right track and focused. The first phase of detox means no eating after 8pm. I know this is late with some eating plans, but I've reduced the time in the weeks coming to 7pm. Right now I was learning to eat at somewhat regular intervals. Do you ever feel like you need a nap mid-morning or mid-afternoon? Guess what? So does your metabolism. Eating frequent, small meals or snacks will keep it on it's toes and moving. It prevents it from wanting a nap, too! Ok, so during the "detox" phase there are a few important steps. Once again, I kept them simple and small. No eating after 8 pm. If you drink coffee, reduce your sugar by 25%. If you put 4 teaspoons, just put 3. If you put 2, try putting 1.5. You get my drift. The last thing I did during this 2 week phase was eat serving sizes. I didn't impose a caloric limit at this point and I was still eating whatever I wanted, however, the new change was that I could only eat whatever a serving was. After logging all of my food for 2 weeks and realizing the amount of food I was eating, I found myself making better food choices. Now with the serving size requirements, I was choosing foods even wiser. This will take you through weeks 3 and 4.

Right about at this point, I was one month in to living a healthier lifestyle. Let's review the weeks:

Weeks 1 and 2:
Drink 64 ounces of water daily
Log food using an app

Weeks 3 and 4:
Continue doing Weeks 1 and 2 tasks
Measure, Measure, Measure! Eat only a serving size!
No eating after 8pm
Lower sugar intake by 25%

Now we have the tools we need to really get this process going so for weeks 5 and 6 and beyond, I cut my sugar in my coffee in half. I currently drink 1.5 teaspoons of sugar in my coffee each morning as well as 2 tablespoons of half and half (this was learned during the serving size & measuring phase and to this day, I still measure these items). My coffee is my one non-negotiable in the morning and since I have drastically reduced the sugar and cream in it, it doesn't feel so bad. Confession: I used to go out and get my coffee and in it I would put one packet of sugar for every ounce the coffee cup held. 12 ounce Dunkin' Donuts coffee? Sure! I'll take it with no sugar, when I will then go over to the counter & proceed to put 12 packets of sugar in it. Replace your afternoon cup of coffee (if you have one) with a cup of tea with lemon or another 20 ounces of water. This will cut out nearly 70 calories because guess what this week starts? Setting a daily limit on what we're eating. Now this will vary from person to person depending on activity level and metabolic rate. I am also breastfeeding my son, so I have a little bit more leeway when it comes to what I eat, however that doesn't mean I can still eat a burger freely and it not have any effects. For me personally, I consume between 1700-1900 calories daily. I have tried to go much lower, but for me, it doesn't work. I tried to stay between 1200 and 1400 but I have had weeks where the scale just didn't budge. Maybe this will change when I am done breastfeeding, but for now, it is what it is. I keep a ratio of 40% carbs, 35% protein and 25% fats. Your body requires all 3 of these to function properly. Carbohydrates give you energy, protein builds muscle and fats keep your heart healthy providing you eat the right kinds (and trust me, there are plenty!). You will find what works for you as you go along. If you eat too little, your body will retain weight. It's all about finding a balance and what works for you.

During these weeks, after I established my caloric intake for the day, I stuck to that religiously. I eat 1700-1900 however, I do not count for breastfeeding and I do not log my exercise into my food app. After all is said and done, I personally may net around 1400. After about week 6, I started really making a point to get some kind of physical activity in daily. I take Mondays off (because that's my weigh in day). I exercise to build muscle and be strong, not just to lose weight. I do some type of physical activity daily. One of my favorite websites is the 30 day fitness challenge one. There, they have listed various "challenges" that test and build your strength and ability. They are activities that you can do, at home, while watching water boil. Very easy, especially if you are limited on time. I haven't necessarily done the "challenges" in order, instead, modifying them to my own ability. At one point I did 50 squats and ended up being so sore for 3 days that I quit and stopped doing them altogether. 15 squats per day is better than 0 squats per day. I have ADD when it comes to fitness and bore easily so these give me something I can change every few days. I began walking. At one point, I was running, however I have allergy-induced asthma and was put on meds for some time and was just never able to go back to it. I have quite a ways to go (about 70 more pounds, but I would be happy at 40 for the time being). At my weight, I sometimes find it hard to consume all the protein that is ideal so I started drinking LRW Protein Powder and love it to pieces. It has 24g of protein per serving and I drink it IN ADDITION to a light breakfast or after a workout. I don't replace anything with it (although you CAN) and I find it enhances my diet tremendously. At some point, months from now, calorie counting won't be necessary and instead I can become "calorie conscious". You have to be aware of what you're eating, however when you are at the level of maintaining your weight or slower weight loss and have the proper knowledge of your body and how it handles food, I am not sure that calorie counting and measuring is necessary. I would revisit the measuring cups maybe every other month because sometimes when you eyeball ingredients, you may eventually add a little here and there, thus throwing off your portions. I took a break from Phase I of my journey for 2 months and kicked it back into high gear recently. During the holidays I gained 5 pounds. I took it back off within a few weeks without killing myself. I always weigh myself on Mondays and to celebrate a weight loss (here we go again with celebrating with food), I allow myself a cheat meal - not day - one meal. If I don't eat it on Monday then it has to wait until next week. I think weighing yourself on Mondays helps to keep yourself in check for the weekend. Why undo in one day what you worked so hard all week to achieve? At this stage I eat very little processed foods and refined sugar other than what's naturally occurring in the foods I do eat. I have become very educated and have spent many hours researching various topics. Once again, I'm not an expert, but I know a lot. I have tweaked recipes and use websites more as a guide to inspire me to make my own dishes. Cooking has become fun and inventive. When I am looking for a dessert or something to satisfy my sweet tooth, I look for recipes that contain all natural ingredients and immediately cut the sugar in half. You wouldn't believe how little sugar you can live on when you start to remove it from your life. Everything tastes so sweet now, even natural peanut butter (my current absolute favorite snack, with sliced bananas) or dark chocolate (which I would never go near before this change. As of March 2013, the cost for diagnosed diabetes in  the United States is $245 BILLION*. As of  2011, 25.8 MILLION adults and children in the United States alone have diabetes.* I don't want to become a statistic for diabetes, heart disease or chronic kidney disease and so I have made a vow to do what I can to try to live healthier so that my body can run at it's peak efficiency. It can't do that at the weight I was.

All too often I see people in the same position I found myself in, not so long ago. I was desperate to be in the shape I was once upon a time that I found so much fault with. I WISH I looked like I was years ago but my new goal is to be healthy and strong. I don't believe you need expensive meal replacements, workouts or gym memberships. I think if you spent the money on food or maybe nutritional counseling or a personal trainer you would get just as good results that would have a bigger sense of permanency because you are armed with the knowledge.  I know with the tools I have learned and the way I have reprogrammed my way of thinking, that this is absolutely possible and I WILL reach my goals. Thankfully, I have welcomed some amazing people in my life. This was a process that was kicked into high gear by doing weight loss challenge (which I have recently joined again for another round) and I had the most amazing, well educated "coach" who knew so much about nutrition and health. To this day, she is in my life every step of the way and I cannot be more grateful that I have these people in my life that share my way of thinking. The accountability and support has been nothing short of fantastic and positive. It's a long road and it takes dedication, perseverance and patience but I am willing to walk with anyone who has a good pair of walking shoes and a positive attitude that anything is possible!


*Statistics via The American Diabetes Association

No-Bake Homemade Energy Oat Bars

Homemade bars at a fraction of the price!
A few months ago, I had posted in my group a recipe from Door to Door Organics for these "no-bake energy bites". They looked easy enough and had minimal ingredients, all of which I had handy. I thought to myself, "I can make this in even less time by pressing them into a small pan, throwing them into the freezer to set and then cutting them into bars". It worked and I saved myself the time of rolling little balls. These are super easy to make and a really great alternative to pre-packaged granola or energy bars. We're always trying to save some calories and dollars are just as important. It's all about budgeting efficiently! Here is my tweaked version.

You will need:
1 Tbsp unsweetened coconut flakes
1/2 C natural peanut butter
1/4 C honey
1/4 C ground flaxseed
3/4 C oats
4 Tbsp chocolate chips

Mix peanut butter, honey, ground flaxseed & oats in a bowl and set aside. Mixture will be very sticky and thick. In a small bowl, melt chocolate chips. I typically microwave them for 1 minute at 30% power. It's better to have to put them back in the microwave, than to overheat. While they are melting, press mixture into a coated 6 x 6" square pan. My favorite one is made by Wilton and it is the smaller pan pictured here. If you live near Ocean County, NJ, Shore Restaurant Party Supply has great pans that I adore. I only have the round ones from there, however, they have square as well (at least the last time I was there they did). By now your chocolate should be melted. Using a spatula, pour it over the pressed oat mixture & spread it over the top. Before it is dry, sprinkle 1 Tbsp unsweetened coconut flakes on top. Set in the freezer for about 15 minutes. Remove from the freezer, wait a minute or 2 and cut into 9 bars. Keep stored in an airtight container in the refrigerator.

Each bar contains:
Calories: 77
Fat: 4.49g
Carbs: 8.28g
Dietary Fiber: 1.4g
Sugar: 4.6g
Protein: 2.6g